Friday, July 24, 2015

Coupler Enclosure

Now that the motor has been positioned, all the rest of the mounting is falling into place. The flanges for the rear motor face and front of the torque tube are bolted on and the coupler housing has been precision cut to fill the space in between.


The top has been left open as an inspection port and will be covered by a bolt-on plate.


The new front crossmember has been welded into place and motor mounts fabricated.


The rear crossmember will be attached to the lower front face of the rear motor flange. There is a scant 1/16" clearance between the motor and the highest point on the steering rack. In this game of fractions, that's just enough!


Great progress this week!


Update 7/28/2015


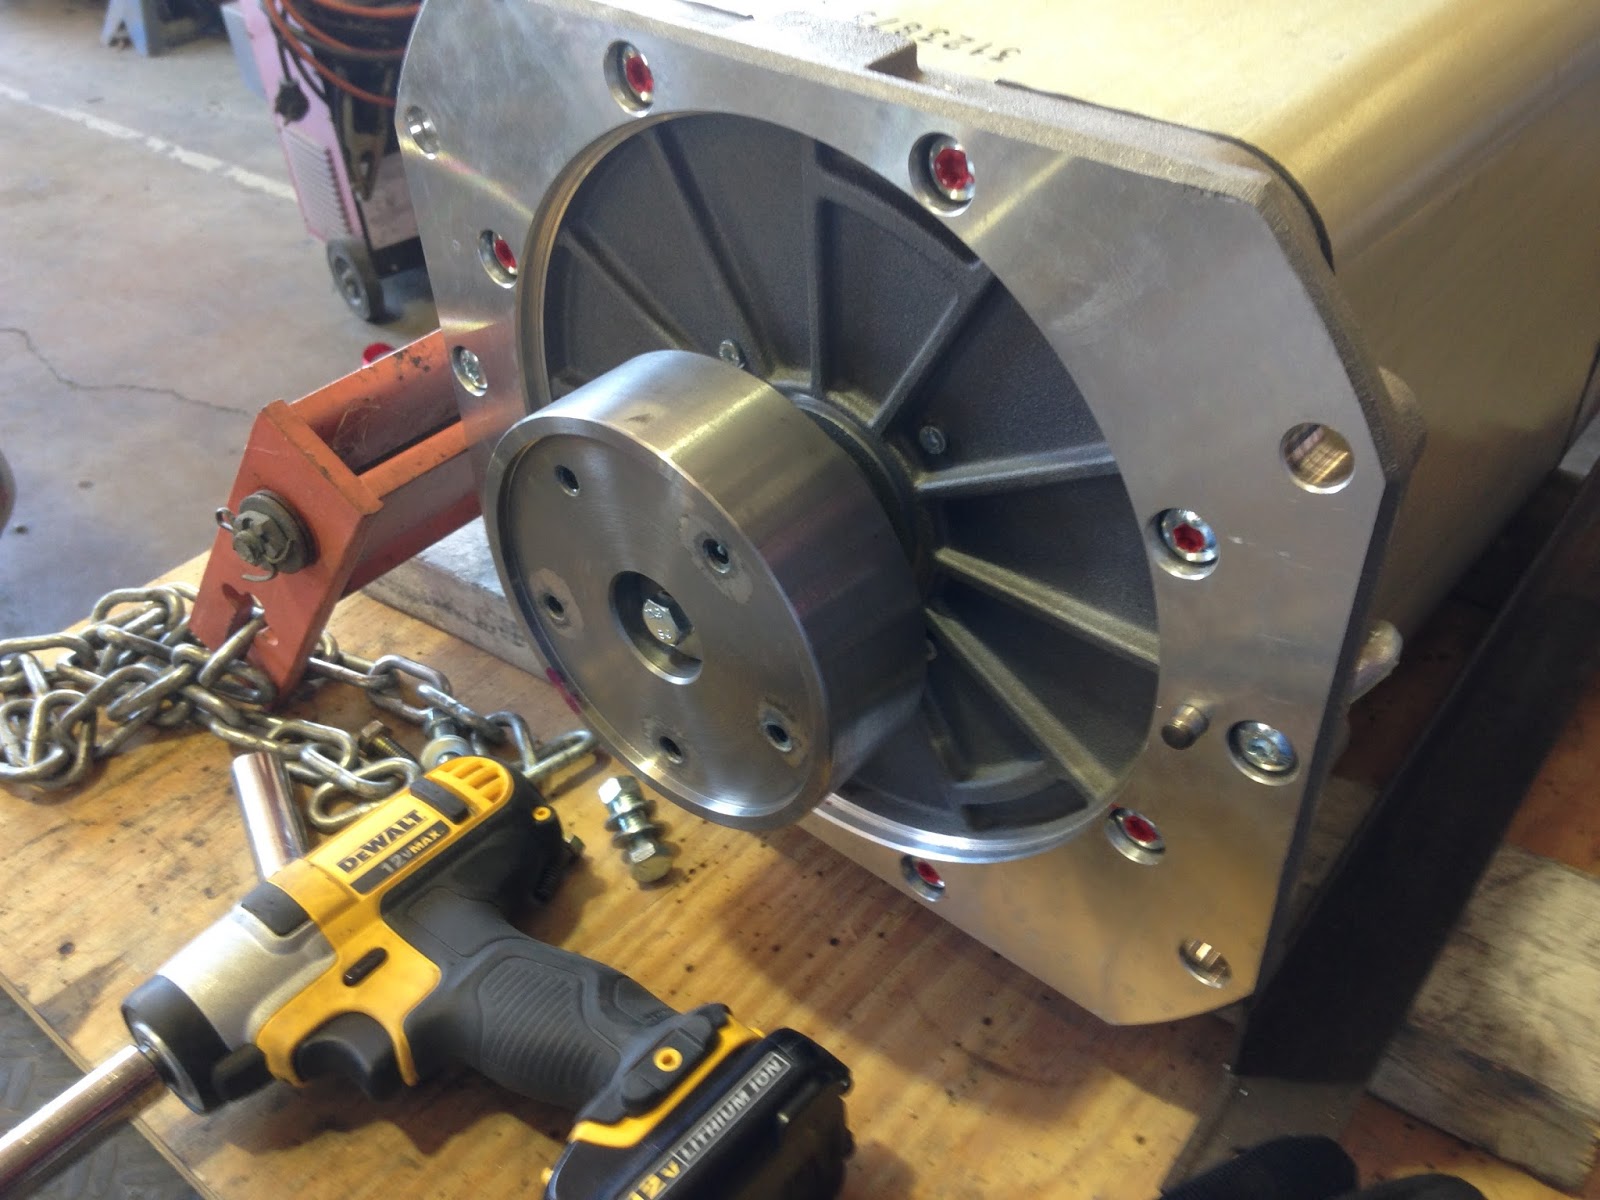
Here is the coupler enclosure on the bench receiving the rear crossmember mount and being fitted for the top cover:


Of course it's not as elegant as an adapter plate CNC carved from a billet of shiny aluminum, but it's beautiful in its own direct way. It does the job and a little black paint will make it disappear.


Wednesday, July 22, 2015

Motor Is Going In

Things are picking up! I arrived at the shop on Tuesday to reverse the strapping on one of the battery banks, and found Robert under the car adjusting the placement of the motor. He had brought a very stout A-frame motor hoist from his home shop and was leveling and easing the motor into place.


Here are some views from underneath:


The portion of the shaft that was intended for the pilot bearing has been cut off so the drive shaft splines go all the way to the motor shaft bolt, leaving an inch and a half of splines showing. This places the back of the motor about four inches from the firewall leaving room for the air-conditioning, heating, and vacuum lines to run behind. Robert will fabricate the adapter to mate the driveshaft torque tube with the rear face of the motor to hold the coupler in alignment.

 Robert found the "sweet spot" where everything was level and the motor could be moved fore and aft with a fingertip. He's adding two new crossmembers to support the motor/inverter/charger assembly. We lost the DC/DC Converter due to the length of the assembly, and will have to find another home for it.

With the forward crossmember tack welded in place, work began on the motor mounts.


The man is artist in metal!
Meanwhile, I pulled all the connectors from the passenger side bank of batteries to flip it end to end so the terminals face the inside. While I had the strapping off, I took the opportunity to raise the voltage on the cells affected by the "chain incident" to get them in line with the other cells.


I may need to do this couple more times, but it's closer now.

Monday, July 20, 2015

Go With The Flow

The idea of buckets and a stopwatch seemed a bit crude and sloppy, so a bit of searching turned up this little gem. It's a  meter that attaches to a garden hose and measures the flow of water. Either gallons or liters can be selected for display.


I cut a garden hose reel leader in half and the outside diameter of the hose made a water tight fit with the inside diameter of the clear vinyl tube. It's good to be lucky sometimes.


Using the timer function of my iPhone, I clocked a minute and turned off the pump power switch when the alarm went off. It only took a couple of runs to get the PWM signal generator tuned just right.

Both the Seimens motor and the DMOC inverter call for 16 liters per minute, so this is a good result. At this speed, the pump makes no noise at all.

With both signal generators pre-set, installing the wiring for the cooling pumps will be a plug-and-go affair. I only hope all the other electric wiring goes as well.


Friday, July 17, 2015

Pump Testing

Robert removed the coolant pump setup to give him more space to fit the motor, so I took the opportunity to bring the assembly home and get some testing done to make sure the pieces I had stashed away will actually work. The Pierburg CWA50 pumps were sourced from EVTV and were used in the same Ford Transit Connect vehicle that provided the Siemens motor and DMOC inverter.

I put together a test rig in the garage initially with a piece of clear vinyl hose recirculating back into the catch tank. I can watch the fluid pass through the hose to verify it's actually pumping, then try to vary the pump speed and therefore the flow rate.

My friend Tim Catellier worked through the use of a Pierburg pump last year on his beautiful BMW Z3 conversion. Although Jack Rickard runs the pumps at full speed, 30 liters/minute, Tim notes that more water is not necessarily better. The DMOC calls for 13 to 16 liters/minute, about half the flow rate this pump is capable of. The pump does provide for speed control by a PWM (plus width modulation) signal, so a PWM signal generator is needed. 


Tim built his own, but since Radio Shack has gone out of business, I let my fingers do the walking and found this tiny contraption on eBay. It was really a shot in the dark, but at only $4.65 each plus $1.50 shipping from Hong Kong, there wasn't much to lose.

I'm pleased to report that it works just fine. Turning the little brass screw on top varies the speed from full bore to just barely moving. 


The pump is almost silent at all speeds, so won't be intrusive. I did notice that it seems to aerate the water and not sure what that's about or if it's any cause for concern. I don't have hose clamps on it, so it may just be an air leak somewhere in the short loop.

A more pressing question is how to measure the flow rate and set it to about half. Once the screw is set, it will stay at that speed, just need to figure out what that is. So buckets and a stopwatch figure to be a big part of my weekend.

Coupler Attached

I visited Pro Automotive to drop off a battery bank I'd reconfigured (more on that later) and found that Dave the Machinist had finished mounting the coupler to the motor. I had really wanted to get some video of the process, but apparently Dave did this after hours when he could avoid interruptions and distractions. Bob says Dave can remachine a Chevy head in his sleep, but this was enough different that he wanted to concentrate. And a beautiful job it is! it has been balanced and checked for run-out (wobble) - less than a thousandth of an inch I'm told. Should be a smooth spin.


Robert plans to bring his A-Frame engine hoist from home to get better control of the motor placement to fabricate the additional cross members and get the alignment perfect before building the adapter housing.


In the meantime, he's made templates of the battery box to make water tight liners. Doing that led to a rethinking of the battery placement, and it made a lot of sense to move the four-pack that was to have been mounted vertically behind the transaxle up next to the other in the center. This will make for a cleaner battery installation while making the wiring much simpler. Seat of the pants engineering at its finest.


Monday, July 13, 2015

Fenders!

Robert stripped the accessories from the motor and wheeled it to the machine shop next door for final fitting of the coupler. The coupler will go in the oven and get heated to 300 degrees or so to expand and fit over the shaft and splines. As it cools it will contract and make a solid connection. That's supposed to happen this week.

In the mean time Robert has been busy with body work. The front fenders and nose have been bead blasted, filled, and given a coat of epoxy primer.


The parts have been trial fit to check for proper alignment and gaps. There's one gap that will need to be filled and the passenger side headlamp unit needs to be finessed just a bit, but overall a very satisfactory test fit.


The hood has also been blasted and a number of hail dings worked out. It's in the paint booth after getting its coat of primer. Robert feels like the rest of the body will buff out nicely. There are a couple of small hail dings remaining on the roof that should be fixable by one of the "paintless dent removal" shops after everything else is done. The last body piece that remains is the valance that goes below the bumper. Based on my searches, these things are usually in sorry condition from parking curbs and road debris. The one that was on my Porsche is pretty beat up, so the next step is to find one that's a bit less so.

Nice to see things start to come together.